Hi everyone, or no one? Here is a
breakdown of my Picture of the 11 Doctors, which really is only a
Thumbnail that I am using to plan out a much larger Acrylic Painting.
I will project it onto a 22x32 piece of illustration board and Draw
it out. So I left the photoshop work a little sloppy knowing that I
am just going to be Drawing all the hands again anyways I didn't
waste my time here. (arghh Hands!)
anyhoo here we go...
The whole thing springs from Bill and
Ted (ironic?) I really love the Iconic hanging out moment and I
wanted that with The Tardis so I took a screengrab.
Then I Traced out the position of the
guys cause I like the energy and its a good starting point.
Next I Draw in the Tardis in a
different perspective and distort my front guys into place. And then
try to fit in all 11 of them This is where I made the decisions of
composition like Tennant hanging on to the scarf and Smith at the top
with the fez. Then I hunted for Images with that in mind.
Mainly I was looking for facial
expressions, Tennant looking surprised, Smith holding the fez, Tom
Baker, holding the hat with his scarf visible, and Eccleston with a
big grin. The others were lucky finds and they ended up placing
themselves in the image.
I grabbed a shot of the Time Vortex, I
liked this one because of the Lightning bolt, I rotated it into a
better composition and Painted in the missing parts.
I grabbed some shots of the Tardis and
skewed it into place. The key is to do one side at a time and use the
Transform>distort function to match the perspective I wanted, then
I painted in the bottom.
At this point I crop out all of the
reference pics and place them. Then paint in the arms and pieces to
fill in the gaps. Each doctor is on its own layer and I work on a new
layer then merge with the photo. Because I merge them down to
individual layers I don't have the Process images to show what i've
done but essentially I just clean up the edges and roughly paint in
the missing anatomy to tie them all together.

Here it is at the end of my photoshop
portion of the work, you can see I have extended the canvas to give
it more room and rotated things around and changed the placement a
bit. The advantage of having them on separate layers is I can
endlessly nudge them around. I finished painting in Tennant and Mccoy
and used the Transform>warp feature on their bodies to give that
nice curve and motion, also because I suck at foreshortening. As
always whenever you add or transform an element you have to go in and
paint over it a bit to fix the wonkiness. And thats about it shake
well and serve... Time to prep my board for drawing!
I start by painting my surface medium
grey with Gesso this gives me a nice surface that acrylics stick to
very well. The key is to wet the back of your board or paper first
then Gesso the Front and leave it to dry. That way both sides dry at
the same time and the board wont warp (much.)
Next I project my photoshop comp onto
the board and pencil it in with a light pencil. It's usually hard to
see so you keep checking back and forth with the projector and a
printed photo to make sure you get the placement of the major forms.
It's important to remember that you are making a 2d representation of
3d forms and should follow your gut as much as the reference. Just
tracing a photo wont make the drawing work it'll look really stupid,
you have to interpret what you see into shadow and light areas.
Next I erase everything until I can
barely see it and Start Drawing with a darker pencil and looking
closely at the photo for specific features that create the
resemblance of your subject.
Next I did an Acrylic Wash over
everything to set my Drawing in Place. MISTAKE!!!! It created blotchy
areas that were a PITA for the rest of the process. Nowadays I spray
my stuff down with a workable fixative, It works so much better.
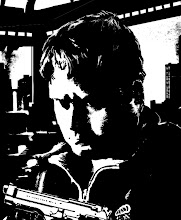
Next I painted in my blacks
and then my colors, usually I leave
color for the next part of the process but The specific costumes made
me choose to lay some in ahead of time.
Next I lay in the colors and skin tones
with an airbrush. Very lightly to preserve the drawing underneath.
Then the fun part I go back in with
Prismacolor Pencil Crayons (colored pencils for you Yanks!) and I add
in the bright highlights with white and move onto reestablishing the
darks.
Then I went Back with The airbrush to
add a little Volumetric lighting to the light sources and the Text.
Then again with pencil crayons to bring
back anything I have lost.
Scan it and add a little photoshop
Tweakery and we're done!